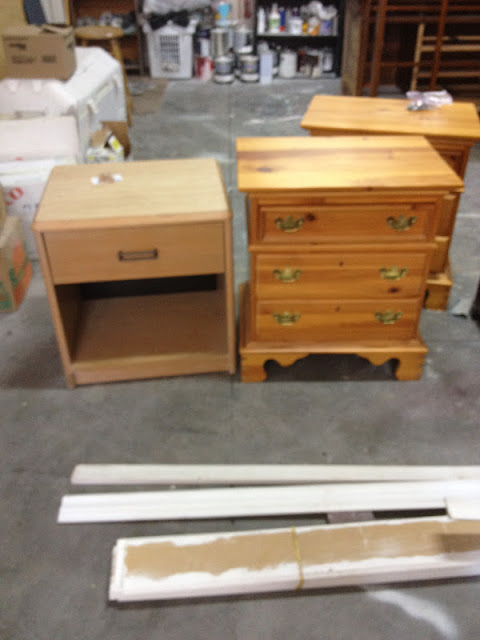
To make this taller I added some 4X4 legs underneath and then put moulding on the outside to cover the ugly wood chunks and add some "cute".
I think I used about 7 inches of moulding on the bottom. The drawer also needed some trim. After taking this picture, I decided the top looked off balance so I added some beadboard and trim there too.
To make the nightstand below look okay in a boys room, the swirly bottom had to go. This was a much easier fix. I just added moulding over the swirls, and got rid of the old handles.
Sometimes I go in furniture stores just to look. I can't believe the prices people pay for stuff! It's CRAZY! Especially when you see what can be done for just a fraction of the money! And who doesn't love saving money?!


WOW!! You have done a great job on both of these pieces. I love saving money too, and cannot believe what we've been able to save doing projects like this. You have an eye for it and I love your projects. Megan
ReplyDeletewow you have vision! i would have never thought of those awesome ideas!
ReplyDeleteWell aren't you fancy! I love them both and the great shade of black.
ReplyDeleteI am so excited I found your blog! These are great pieces and just what I need for the new printer table I need to buy. Thanks for the inspiration!
ReplyDeleteamazing! Love that top one. what a change.
ReplyDeleteblessings
barbara jean
What kind of moulding did you use? Is it crown, base, floor? I didnt realize there were so many types until I went to lowes.com. I have 2 short nightstands I just bought and want to use yours as inspiration to make mine taller! Great post :)
ReplyDeleteThanks in advance,
Shay
www.dearmarleigh.blogspot.com
Nice blog thannks for posting
ReplyDelete