One-of-a-kind furniture and home decor!

You can reach me at 435-862-0908 or email sharleyfunk@msn.com.

Tips On Aging Wood

No, I didn't age these doors.  These are 100% all natural.  Aren't they AMAZING?!

 Remember The Big Day Vintage Weddings Rentals that I told you about here?  Lynette found these fabulous doors pictured above.  Wouldn't they be a beautiful backdrop for a wedding?  But, she faced the task of finding a way for them to stand and be sturdy.  No bride and groom want their backdrop to become a face-drop, right? 

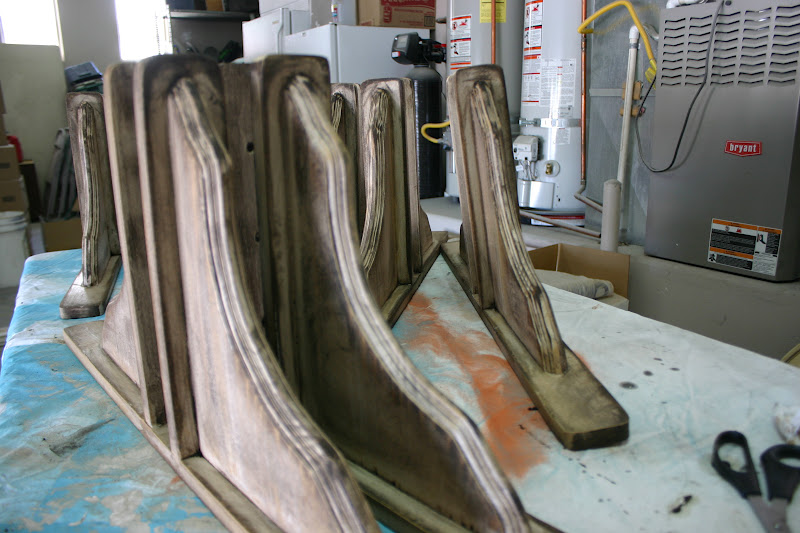
So Lynette's husband made these stands for the doors.  Brilliant!  Except they didn't match.  Bummer.
 To give this fresh new wood a beautifully aged look I painted them and then sanded off most of the paint.  Ha ha.  I didn't say everything I do makes sense but stick with me here.
 Next step was to put a dark walnut stain over the whole thing.  A dark glaze would also work.  Just wipe it on, and wipe it off.  Easy Peasy.  I then took a dry paintbrush, dipped it in a cream colored paint, wiped most of the paint from the brush, and lightly brushed across the wood.  This just gives it one more color dimension. 


Here the doors are at their first wedding.  The picture is a little blurry because it came from a phone, but that just adds to the "vintage" look, right?  If you look really close you can see the stands. 

So the moral of the story is:  Don't be afraid to mess up your beautiful new wood!  Just go for it!!!

Updated Cedar Chest

I'm guessing this was made 1990ish, don't you think?

 The owner of this baby was sick of all the curves and swirls and just wanted some nice clean lines. 
 So, as you can see, I removed the swirls and fluff and added a piece of wood to the front to cover the curvy designs there.  Then I just used some moulding to frame it all and give it a little depth. 
 Next came paint and new knobs.  Now it has a totally different look! 

Sooooo much better!

Same Set, Different Look

This is part of the bedroom set I refinished for my daughter.  She doesn't need a headboard and extra nightstand so I decided to go for a totally different look on these two pieces. 


 I love the design on the top and side of the nightstand so I added  glaze to make the groves in the wood really stand out. 

 For Sale $125

Before...

Ombre Dresser

More stuff for my college girl... 


 Here's a pic with her beadspread.  She loves bright colors, can you tell?
 Before...

Linked to 
Saturday Nite Special link party via Funky Junk InteriorsPrimitive and Proper

I LOVE this look!

This is the layered paint look that I'm currently in love with.  I painted black, then white, then grey, and hand sanded with 150 grit sandpaper so all three colors are showing through.  When the clear lacquer is sprayed it gives it this super durable and smooth finish. 


 These two pieced had no business going together before, but with some new knobs and matching paint they're a match made in heaven. 

Linked to
Saturday Nite Special link party via Funky Junk Interiors

Spruced up Tables

 These aren't the best pictures, but they still show what a different look you can achieve with just a little paint.  If you're thinking of changing things up in your home, it doesn't mean you need all new furniture.  Maybe all you need is a little paint!  Think of the possibilities!!!


Happy 4th of July!

Hope everyone has a fun and safe holiday.  I'm so grateful to live in this country and especially for all the military members and their families.  Thanks for your work and sacrifice.