New Table Top
This poor couple bought a NEW kitchen table and it started to look like this within a few months.
The table legs and chairs were fine, but the top was chipping away so they brought it to me! Here's what we did...
Instead of trying to match the dark color, we decided to go for some contrast. I stripped the top, sanded it, brushed a light coat of watered down paint, glazed, and sealed it! I think it turned out beautiful!
Sassy Red Bedroom Set
My very favorite thing about refinishing furniture has to be all the awesome people I meet. Cool people like cool furniture I guess. :) Connie, the lady I refinished this red bedroom set for, is one of those "cool" people. I LOVE her! I felt like she was family and I'd know her and her husband forever! I'm so glad I was able to refinish her stuff. She was very daring and decided to have her oak bedroom set refinished in bright red.
Here is the before. As most husbands do, Connie's husband wondered why she would want to paint a perfectly good piece of wood furniture. LOL They just don't get it!
Labels:
armoire,
bedroom set,
chair,
poster bed,
red
Stubborn Dresser
This dresser was supposed to be a blue gray, but it WAS NOT cooperating! Someone had tried to color in the chipping finish with some mysterious red stuff. I should have taken a close up, but I didn't think it was going to give me so much trouble!
First I primed, then I primed again, then I tried sealing it. Then I searched the internet to see if anyone else had a magic cure for "bleed through". NOPE!
So, I said "FINE! You can be red!"
"But you're getting black glaze whether you like it or not!"
We all know red is my favorite color, so I can hardly blame this dresser for wanting to be red. We all want to stand out a little, right? I think she turned out beautiful! I guess the blue gray will be for another day.
Linked to 

Labels:
black glaze,
Dresser,
red
How to Make Hardware Look "Rusty"
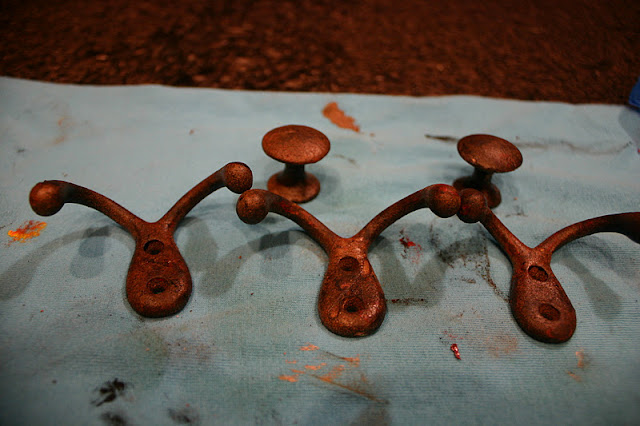
I've refinished a few projects that needed some good rusty hardware for the final touch. After scouring the internet on how to do this, I gave up and came up with my own version. It's much easier than anything I could find out there.
So, here's what I started with. I had painted them previously, but didn't like how they turned out.
First I sprayed them with Rustoleum Multicolor Textured paint.
I let them dry for about 15 minutes. I didn't want the paint to be completely set because I like to mess up the texture a little.
Normally I use black, red, and orange paint but I was out of orange so I improvised.
Next, dab some color onto your project in random spots.
I wear gloves and just dab at the hardware with my fingers until all the colors are blended. I usually add a little more black as I'm going. There seriously isn't a science to it. Just go to town blending.
Not the best picture, but here it is on a thrift store shelf I refinished. It's a wedding gift that has a personal touch, but didn't break the bank!
Labels:
beadboard,
Black,
Rusty Hardware,
shelf
Orange Pottery Barn Desk
This is another piece that is in much better condition than the stuff I usually work on. I LOVE when clients are so brave with furniture that already looks nice. Most of us are not so daring! :)
So, here is the before...there was seriously nothing wrong with it, except a little dust from my garage.
And After! Now it just has that extra something special! It went from ordinary to extraordinary!
Labels:
desk,
glaze,
orange,
pottery barn finish
New Hall Tree Turned Old!
Yup, this is a piece of furniture that most people would LOVE just as it is! But, this is going in Heidi's house and she likes things to look old. So, here is the before of this Pier 1 Hall Tree...
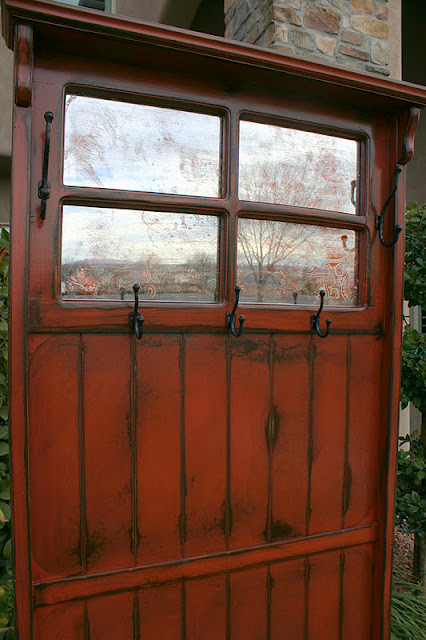
And after it's been aged to perfection!
Heidi wanted the mirror to look old too, so I googled "Acid Mirror" just to see what I could find. What do you know but another blogger from St. George, Utah has some amazing mirrors she's done and instructions on how to do them! Thanks Mandy @ Vintage Revivals! She's even been on the Nate Berkus Show with her mirrors! You go girl!
After I took the above pictures I decided to make the hooks look "rusty". I think it's the perfect final touch!
Labels:
Aged,
distressed,
Hall Tree,
red,
Rusty Hardware
Subscribe to:
Posts (Atom)


